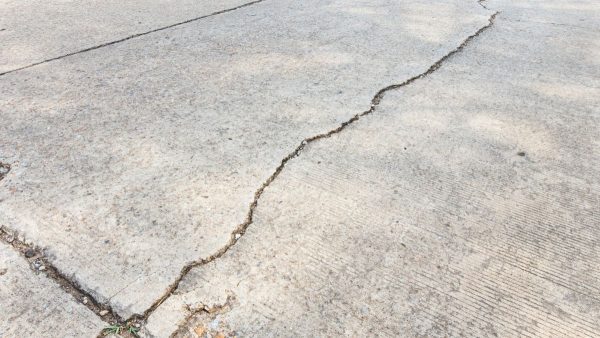
Restoring cracked concrete with confidence

Maintaining concrete surfaces on your property is crucial. It protects you from larger, more expensive repairs later, but it also keeps your property looking professional and welcoming for clients and visitors. Cracks are one of the most common problems you’ll encounter with concrete. While they may seem alarming initially, cracks don’t have to cause panic. With the right approach, you can restore your concrete surfaces with confidence.
Let’s examine how to repair cracked concrete correctly and confidently.
Identifying the crack type is key
The first thing to do when addressing cracked concrete is to figure out exactly what kind of crack you’re dealing with. Not all cracks are the same; understanding the difference will guide you toward the most effective solution.
If the crack is less than ¼ inches wide, a simple patching compound should be enough to repair it. However, it may require more extensive work if it is any wider than ¼ inches. These must often be filled with a foam backer rod before applying a patch to ensure a solid repair.
The most concerning cracks are those that are actively expanding, as this could point to a deeper issue, such as shifting soil or other foundational problems. To ensure the repair holds up over time, the underlying cause must first be addressed for these cracks.
Clean the area for a solid repair
Once the crack is identified, it’s time to prepare the surface for repair. Cleaning the area around the crack is essential to ensure the repair material will bond properly with the existing concrete.
A pressure washer is perfect for this job, blasting away dirt, grime, and any debris that could interfere with the repair. Make sure to do a thorough job in cleaning. Skipping or rushing through the process could lead to a weak repair that might break again faster.
Filling the crack
You can start filling the crack after the area is clean and prepped.
Applying a cement-based patching compound is often the easiest and most effective solution for smaller cracks. You can spread the compound with a putty trowel, ensuring the crack is filled from top to bottom. If you’re dealing with a wider crack, insert a foam backer rod to fill the gap, then apply the patching compound on top.
Ensure the compound is applied evenly and thoroughly, and then give it time to dry. The drying process is crucial because it ensures your repair will hold up.
Smoothing things out
Once the patching compound has dried, the next step is to smooth it out to blend seamlessly with the surrounding concrete. This step is critical for both appearance and functionality. You can use sandpaper or a wire brush to gently sand the area, ensuring that the patch is flush with the rest of the surface.
This will give your repair a more professional-looking finish, which is especially important if the repaired area is visible. Smoothing the surface will also help prevent future stress on the repaired crack.
Protect your repair with sealant
After smoothing out the patch, it’s time to seal the area. Applying a concrete sealant provides an extra layer of protection.
This layer keeps moisture and the elements from getting into the repaired crack and causing new damage. Sealing is essential in regions that experience freeze-thaw cycles, as water entering a crack and freezing can cause the concrete to expand and crack again.
Stay proactive about maintenance
The key to avoiding major damage to your concrete is to stay proactive. Cracks may seem small initially, but left unattended, can expand and lead to more significant issues.
Addressing cracks early saves money and reduces safety risks, such as tripping hazards or water damage that can affect your property’s foundation.
You can often repair cracks yourself with a simple DIY kit. However, if the damage is extensive, don’t hesitate to consult with a professional. They can assess whether a full or partial replacement is necessary or if other solutions, like an overpour, would be more cost-effective.
